Introduction
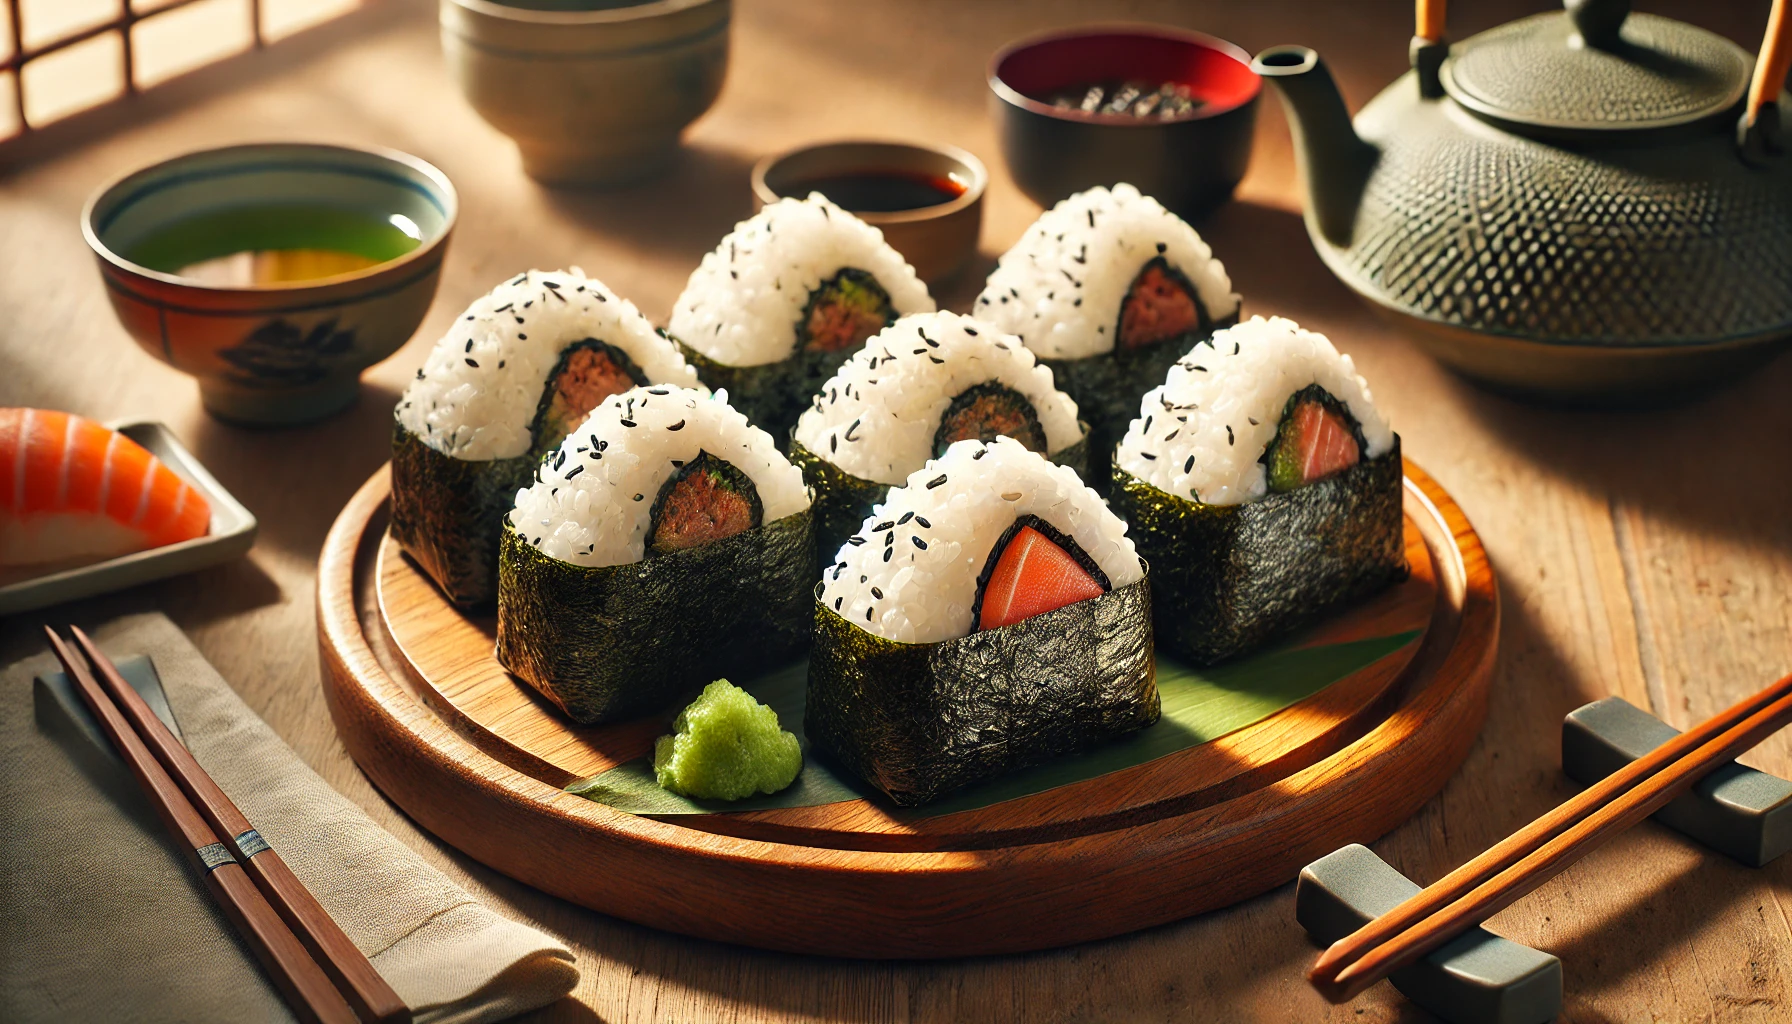
If you’re looking for a delicious, easy-to-make, and highly customizable snack, look no further than Japanese Onigiri rice balls. These delightful little bundles of rice are as popular in Japan as sandwiches are in the West. Whether enjoyed as a quick snack, part of a bento box, or a light lunch, Onigiri offers the perfect combination of flavors and textures. Filled with savory fillings like pickled plum, tuna, or salmon, and wrapped in a sheet of nori (seaweed), these rice balls are not only tasty but also highly portable and fun to make. Ready to learn how to make your own authentic Onigiri? Let’s get started!
Why Are Onigiri So Popular in Japan?
Onigiri has a long history in Japanese cuisine and is beloved for its simplicity and versatility. Traditionally, Japanese Onigiri is made with freshly cooked white rice, which is then shaped into a triangle or oval, filled with a variety of ingredients, and often wrapped in seaweed for added flavor and convenience. These rice balls are a staple in Japanese homes, picnic lunches, and even convenience stores across Japan. The beauty of Onigiri lies in its flexibility—you can fill them with almost anything, from seasoned vegetables to meats, fish, or pickles, making it an excellent choice for a personalized meal. Whether you’re a fan of savory or slightly tangy fillings, Onigiri offers something for everyone.
How to Make Perfect Japanese Onigiri Rice Balls
Making Japanese Onigiri at home is easy once you know the steps. Let’s break it down into simple, easy-to-follow instructions to create these delicious rice balls.
1. Gather Your Ingredients
To make your Japanese Onigiri, you’ll need the following ingredients:
- Cooked Japanese short-grain rice (also known as sushi rice or Japonica rice) – the key to Onigiri is using sticky rice, which helps the rice balls hold their shape.
- Filling of your choice (pickled plum umeboshi, tuna with mayo, or salmon are popular options)
- Nori (seaweed) – to wrap the rice balls and add extra flavor.
- Salt – for seasoning the rice.
- Optional toppings: Sesame seeds, furikake (Japanese rice seasoning), or pickled vegetables.
2. Prepare the Rice
The rice is the most crucial part of the Japanese Onigiri. Here’s how to prepare it:
- Rinse the Rice: Rinse 1 cup of sushi rice in cold water until the water runs clear. This removes excess starch and helps the rice become sticky.
- Cook the Rice: Use a rice cooker or a pot to cook the rice. You’ll need 1 ¼ cups of water for every cup of rice. Once the rice is cooked, let it rest for 10-15 minutes to allow the moisture to distribute evenly throughout.
- Season the Rice: After the rice has cooled slightly (but is still warm), sprinkle it with a pinch of salt. This enhances the taste and helps the rice bind together.
3. Prepare the Fillings
Here are some traditional and popular filling options for your Japanese Onigiri:
- Umeboshi (Pickled Plum): This traditional, tangy filling is made from salted plums. It adds a unique, tart flavor to the rice.
- Tuna Mayo: Mix canned tuna with a bit of mayonnaise and season with salt and pepper. This creamy filling is a favorite in many bento boxes.
- Grilled Salmon: Flake some cooked or grilled salmon and mix it with a little salt. This savory option is a delicious and nutritious filling.
- Other Options: You can also use ingredients like cooked chicken, vegetables, or even miso paste for an umami-rich filling.
4. Shape the Onigiri
Now it’s time to shape the rice into its signature form:
- Wet Your Hands: Wet your hands with water to prevent the rice from sticking. You can also rub a small amount of salt on your hands for extra flavor.
- Take a Scoop of Rice: Take about ½ cup of the seasoned rice and flatten it slightly into a disk shape.
- Add the Filling: Place your desired filling in the center of the rice.
- Form the Onigiri: Carefully fold the rice around the filling and shape it into a triangle or oval. Gently press to ensure the rice sticks together, but don’t compress it too much—Onigiri should be soft yet firm.
- Tip: If you prefer, you can use plastic wrap to shape the Onigiri. This helps avoid making a mess and ensures the rice ball holds its shape well.
5. Wrap with Nori
To add extra flavor and a delightful crunch, you can wrap your Japanese Onigiri with a strip of nori (seaweed). Simply cut the nori into strips and wrap it around the bottom of the rice ball or along one side. Some people prefer to wrap the nori just before eating to keep it crispy.
- Tip: If you don’t want your nori to get soggy, wrap it loosely or just add it right before eating.
Tips for Perfect Onigiri
- Use Warm Rice: Warm rice holds its shape better and sticks together more easily than cold rice.
- Be Gentle: Don’t press too hard when shaping your Onigiri; you want them to be firm but not compacted. Overly pressing the rice will make the Onigiri tough.
- Season the Rice Well: A small amount of salt in the rice gives a pleasant flavor and helps the rice hold its shape.
- Experiment with Fillings: Onigiri is versatile, so don’t hesitate to try different fillings based on your taste preferences. Popular fillings include scrambled egg, cooked chicken, or even sautéed vegetables.
Storing and Reheating Onigiri
Japanese Onigiri is perfect for meal prep and can be stored for later:
- Storing: Store your Onigiri in an airtight container. They are best eaten within 1-2 days if kept in the fridge. If you intend to keep them for an extended time, freezing is a good option.
- Freezing: Onigiri can be frozen for up to 1 month. Wrap them tightly in plastic wrap and place them in a freezer-safe bag.
- Reheating: If frozen, reheat your Onigiri by wrapping it in a damp paper towel and microwaving it for 30 seconds to 1 minute. If fresh, Onigiri is typically eaten at room temperature or slightly chilled.
Creative Variations of Onigiri
If you’re looking to get creative with your Japanese Onigiri, here are some variations:
- Sweet Onigiri: Instead of savory fillings, try a sweet filling like red bean paste (anko) or a sweetened sesame paste for a different twist.
- Furikake Topping: Sprinkle furikake rice seasoning on top of your Onigiri for added flavor. Furikake often contains sesame seeds, seaweed flakes, and a touch of salt and sugar.
- Rice Ball Skewers: For a fun variation, skewer your Onigiri and drizzle with soy sauce or teriyaki sauce for extra flavor.
Conclusion
Japanese Onigiri is not only a delicious, easy-to-make snack but also an incredibly versatile dish that you can customize to your heart’s content. Whether you fill your rice balls with tangy pickled plums, savory tuna mayo, or grilled salmon, each bite will transport you to the heart of Japan. The process is simple and quick, making it an ideal meal for busy days, bento boxes, or casual gatherings. So, grab your rice and nori, and start making your own Japanese Onigiri today!
